
Featured images are the cornerstone of a visually engaging blog post. A good and relevant featured image can instantly grab your readers’ attention. Without a featured image in a blog post, it’s like a book without a cover because the featured image is the first element your readers will notice after visiting your website.
However you can’t just set any picture as a featured image. The image should be relevant to your content’s theme, and should be of correct size, high resolution and dimensions to fit your website’s layout. The size of the image should not be either too small or large. In this article, we will explore how to set the best featured image size in WordPress to make your blogpost stand out.
Recommended Featured Image Dimensions
The right featured image size in WordPress depends on your WordPress site’s theme. Choosing what should be the best size for your WordPress theme can leave you scratching your head in confusion. Here are some of the recommended featured image size that can be used across most WordPress themes:
- 1200 x 628 pixels– Use this size if you are sharing your content in social media.
- 1920 x 1080 pixels– Use this size, if you want your featured image to cover the entire width of the screen.
- 600 x 375 pixels– If your WordPress blog page has multiple posts then this size is appropriate for grid-based designs.
How to Customise Image Sizes in WordPress
Setting the best image size in WordPress is important not only for enhancing user experience but also for improving SEO. Setting the right image size will boost your website’s loading time. Here’s how you can change your image size in WordPress:
Method 1:
Navigate to ‘Settings’ and then ‘Media’.
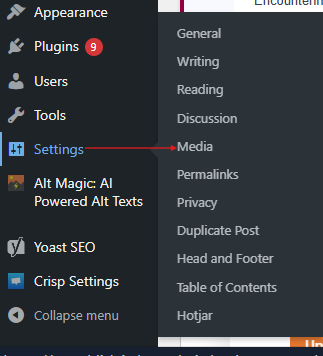
Adjust the image sizes accordingly for thumbnails, medium and large images.
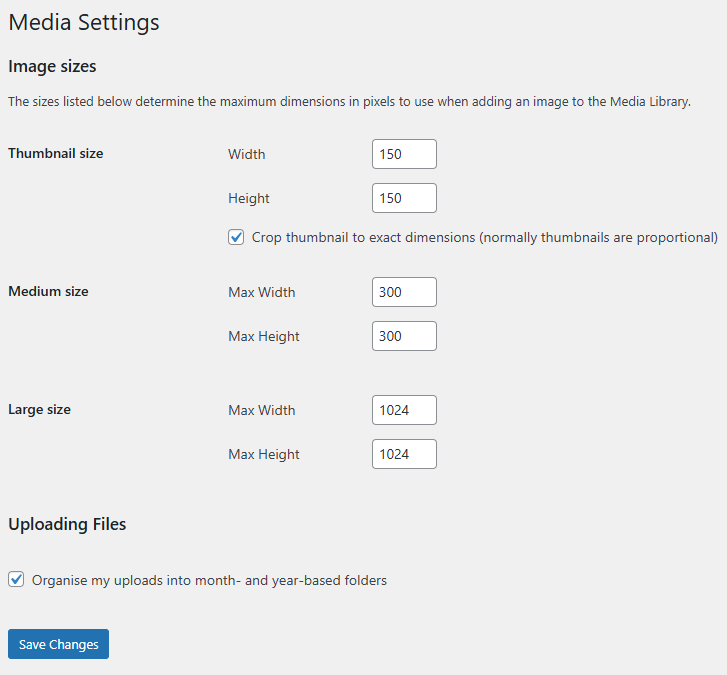
Method 2:
Install plugins like ‘Regenerate Thumbnails’ to adjust and regenerate images.
Method 3:
Use GoPublish Google Doc add-on. Here’s how GoPublish will reduce your effort of changing image sizes manually:
- First, install GoPublish from Google Workspace Marketplace.
- Locate GoPublish add-on on your Google Docs ‘Extensions’ menu.
- Open your document and choose ‘Optimise Images’
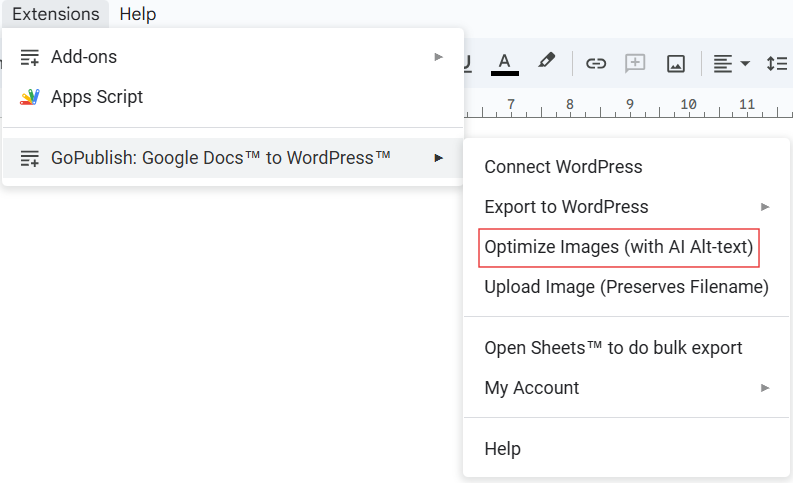
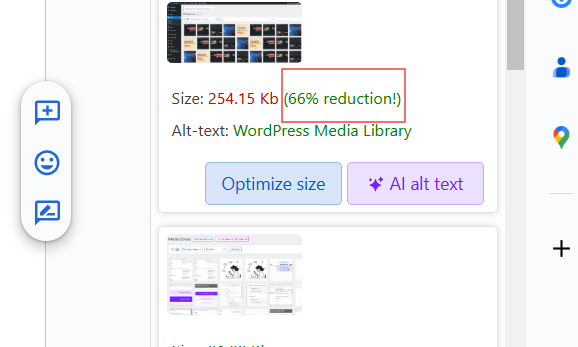
- GoPublish add-on with its ‘optimise images’ feature will appear on the right hand side of your Google Doc.
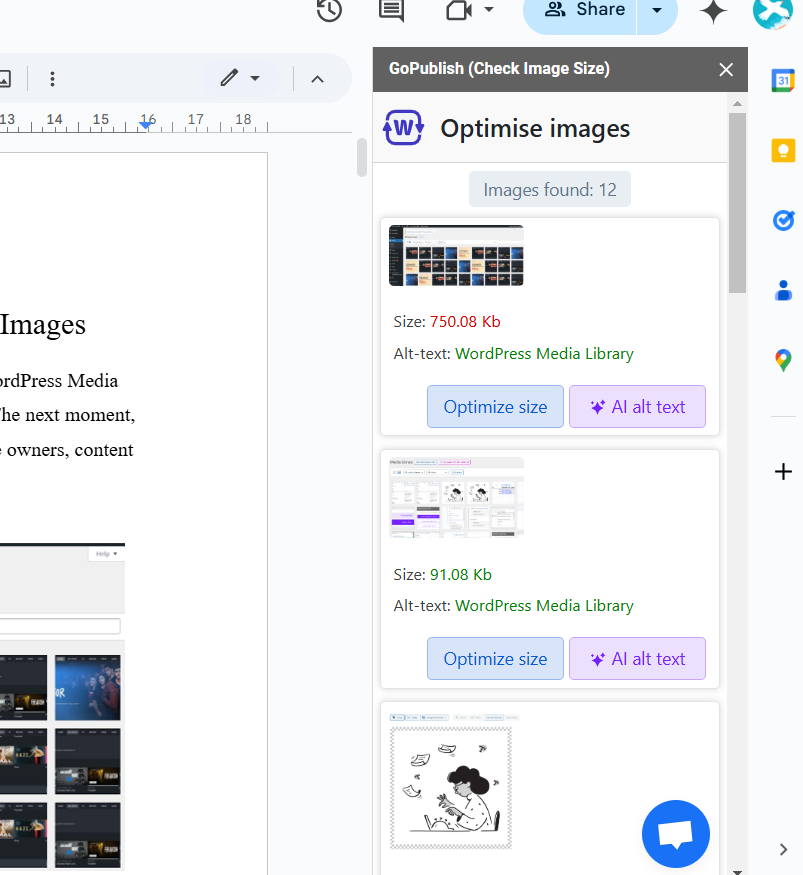
- Click on ‘Optimize size’ and you can get your desired size automatically.
How to Set the Best Featured Image Size in WordPress
First you need to select a relevant image as a featured image for your post. You can do that in a few simple steps.
- If you are using WordPress editor to write your post then, locate ‘Featured Image’ under ‘Post Settings’.
- Click on ‘Set featured image’

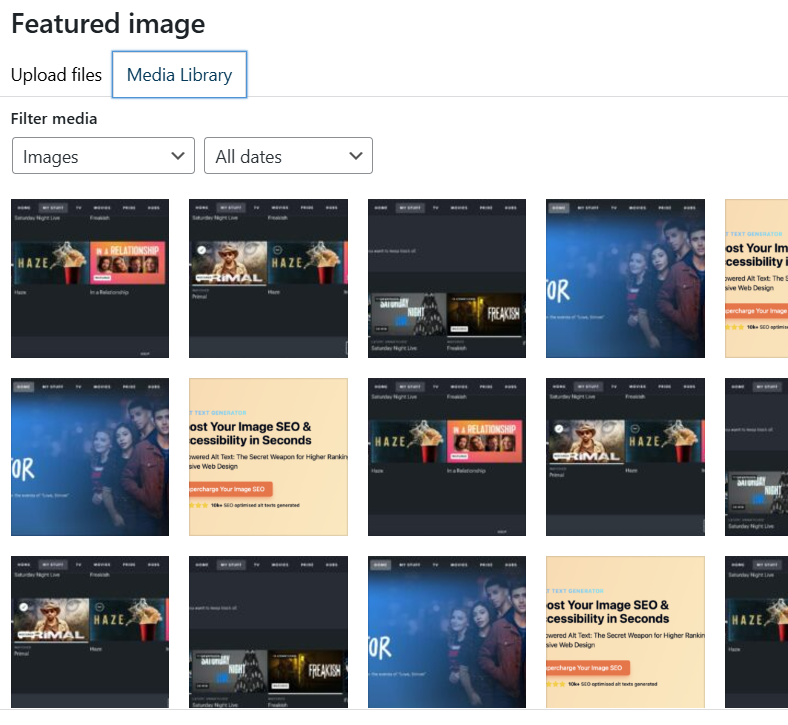
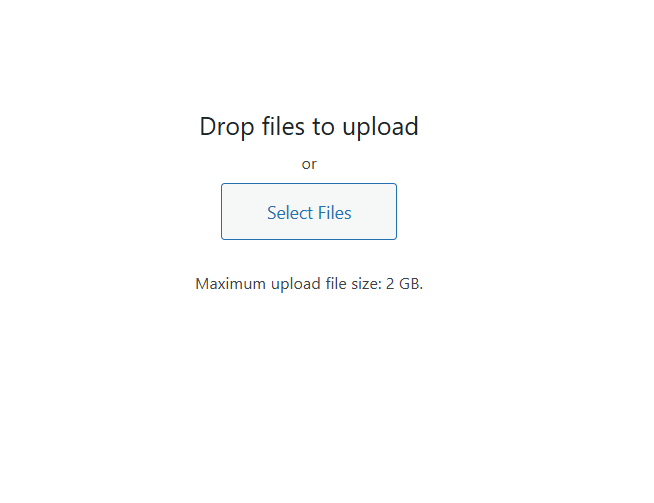
- You will have two options ‘Upload Files’ and ‘Media Library’
If you want to upload any image file from your storage, you can select that.
You can also select any image from your ‘Media Library’. Once you select an image, on the right hand side, you will get options to add ‘Alt Text’, ‘Title’, ‘Caption’, ‘Description’ and ‘File URL’.
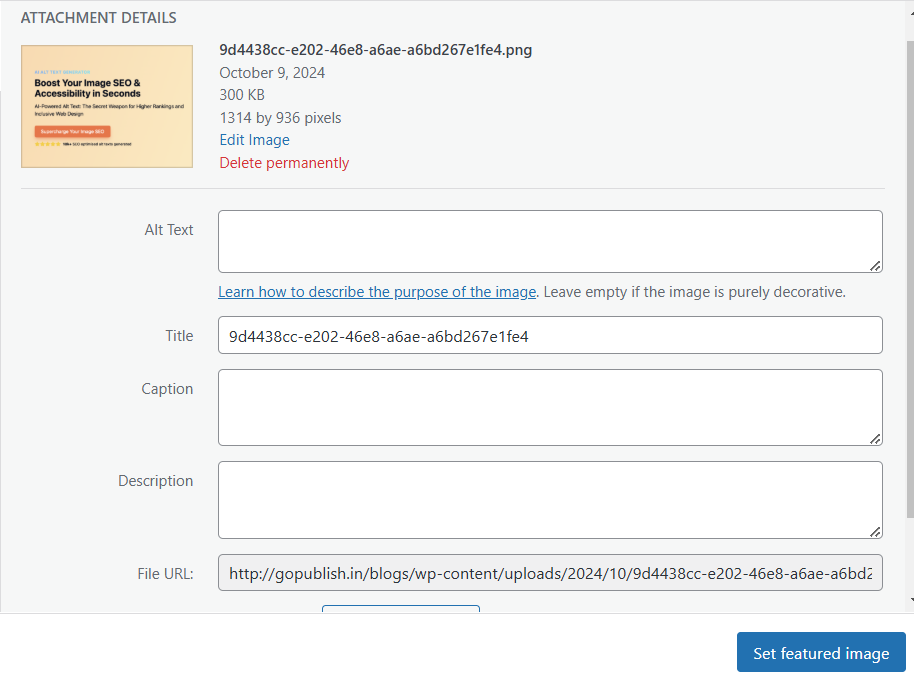
To change the size of the featured image, click on ‘Edit Image’.
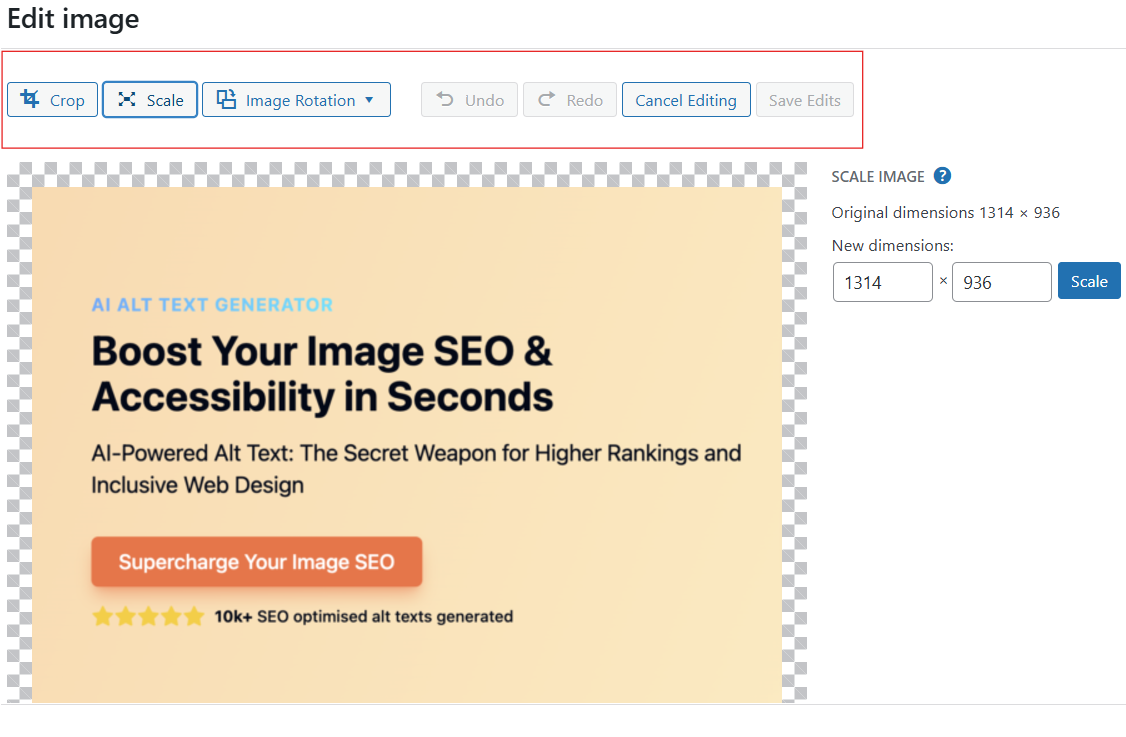
Once you click on that, you will have a list of options to edit your featured image. To change the size of the featured image, click on ‘scale’ and you can change the dimensions of your image according to the desired size.
If you are looking for an even easier method, then GoPublish should be your go-to choice. Using GoPublish you can easily set featured images and even optimise the size of the image or add alt-text without any hassle. Here’s how you can do it:
- After installing GoPublish, click on ‘Extensions’ on your Google Docs to locate it.
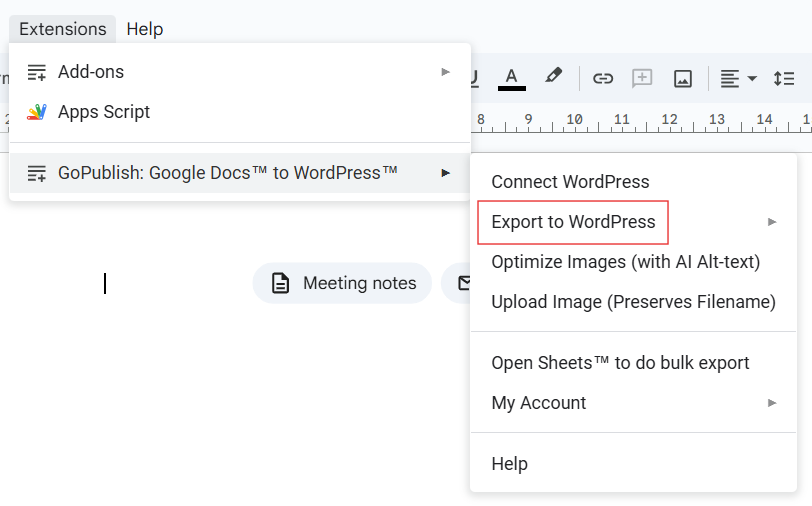
- Click on ‘Export to WordPress’.
- GoPublish will appear on the right-hand side of your Google Docs.
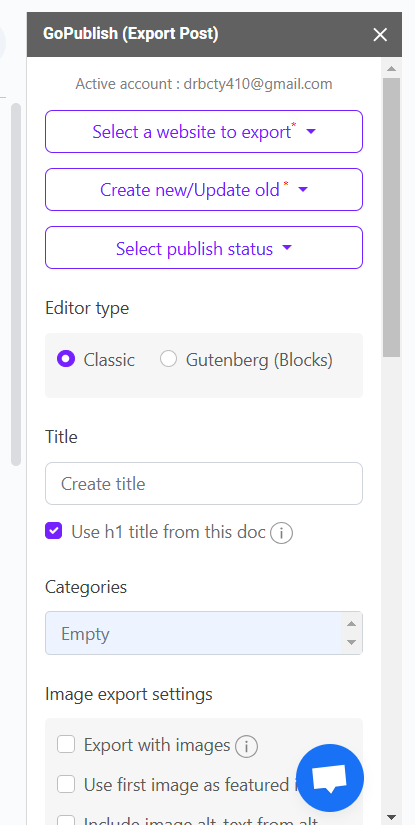
Once you are done with writing your content. Navigate to ‘Image export settings’, where you can find options to export your posts with images and you can even use the first image as a featured image.
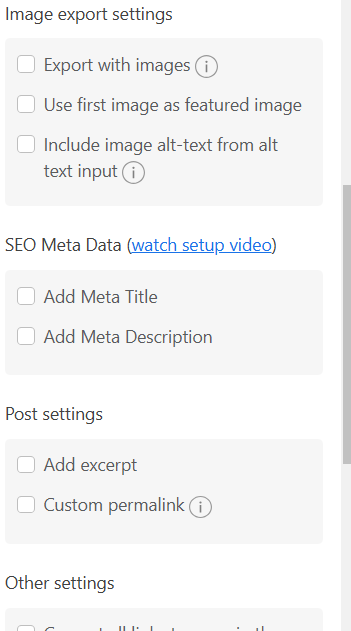
You can also use the ‘Optimise Images’ feature of GoPublish to enhance your images for search engines and even add alt text.
This unique feature of GoPublish reduces the need to open the WordPress editor everytime you want to add or edit your featured image.
Why Featured Image Matter in a Blog Post
Featured images are more than just enhancing your site’s visual appeal. A good and optimised featured image can significantly improve your site’s performance. Here’s why it is important to set featured image:
- Meaningful and visually attractive featured image will grab the attention of your readers and help in building a context
- Adding a featured image will optimise your blog post for search engines.
- Improve Social Media Performance- Eye-catching images increase the likelihood of shares on social media platforms.
Looking for a free tool to create featured images? Try Alt Magic to generate visually appealing featured images in just a few clicks. With this free and user-friendly tool you can create customisable featured images to make your blogs stand out.